Do It Yourself
Whelping Box
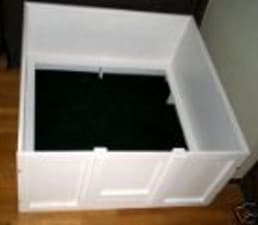
A whelping box, also known as a nesting or birthing box, is a very achievable do-it-yourself project even if you only have basic carpentry skills. In other words it's pretty easy - especially if you map it out using the guidelines in this article.
So let's get started.
What's The Right Size For A Whelping Box?
First step is to decide on the size of your whelping box and that depends on your breed of dog and how large the newborn puppies may be.
It should roomy enough to accommodate her while she lying down nursing the puppies in a fully stretched out position. Basically, cozy and not overly big so as to become drafty, but still have enough room to allow for the growth of the puppies.
Here are some approximate size suggestions:
- Small dogs - Chihuahua, Westie, Pom etc. - 21-34" x 21-34" x 15"
- Medium dogs - Wire Fox Terrier, Jack Russell etc. - 28-34" x 28-34" x 19-20"
- Large dogs - Airedale Terrier, Standard Poodle, Labrador etc. - 42-45" x 34-40" x 22-23"
- Extra large dogs - Golden Retriever, Dalmatian etc. - 48-60" x 48" x 24"
Construction Material Options
When deciding on the material you want to use - think washable.
- An easy choice is laminate, another is plywood coated with non-toxic paint or covered with contact paper after you have cut the panels, but prior to assembly.
- Plastic coated wood is another good option - if you can find it.
Plain unfinished wood is not advised as it is harder to keep clean and retains odors and stains.

You will also need to purchase material to either build a narrow shelf or a rail around the interior of the box.
If you choose a rail, this can be made either from doweling (about broomstick diameter), or pvc pipe joined with elbows.
Rails should be installed about 4" away from the side panels and 5" up from the base (use same distance from base if you choose a shelf).
The purpose of these railings/shelves is to prevent the mother dog from squashing the puppies against the side of the box - they can just slip under and be safe in the space provided by the rail or shelf.
As the puppies grow, they will become adventurous and try to get out of the box. For this reason you can make the exit panel high enough to prevent this yet still a convenient level for the mother dog to come and go.
As an alternative, you can make the front panel to be removable for when the pups get bigger.
Open Or Closed Base Whelping Box?
Finally, whether you choose an open base for your box or build one in, you will need to purchase pads to place within or underneath the box.
These whelping and puppy pads are both waterproof on the bottom side and washable - nice!
Plus they can be used around the house during puppy house training.
If you choose a closed base, start your project with a piece of lumber cut to your selected size of nesting box.
To this you will attach a frame to the underside to raise the box off the floor (especially if the box will be located on a cold floor) - 2x2's would work for making this part or you could just cut blocks to go under the corners.
Whelping Box Assembly And Accessories
Attaching the various components of the whelping box together can be
done with screws or nails. Screws will work better if you will need to
disassemble the box later for storage purposes.
For bedding, the
cheapest route is newspaper which provides good insulation and is also
easy to clean up and replace as needed - but don't forget a waterproof pad
underneath.
For additional comfort, artificial sheepskin, with or without a rubber backing, can be added on top of the paper. It's also easy to wash.

Do it yourself whelping boxes can also be made much larger and divided it into compartments.
This type of box is intended to provide separate areas for sleep/nursing, potty, and play as the puppies get bigger.
Budget Considerations
The cost of whelping boxes may be an important consideration in making your decision. Here are some guidelines:
- Disposable double walled cardboard boxes including dowels run around $70-150 (if you can find them) depending on size.
- Corrugated plastic boxes run between $199 - 300, again depending on size and also quality.
- If you buy a heavy duty box designed to use for a long time, you would be looking to spend anywhere between $400-750
- Do It yourself. The cost is variable depending on the size and type of material used. The painted plywood type box would run you $100 or less for a large/x-large size box. Plus the value of your labor of course!
So there you have it, the rest is up to you and we hope this article has been of help.
Do It Yourself - Conclusion
Whichever route you choose to go in getting set up for this exciting event, I know your dog will be ever so grateful if a whelping (helping) box shows up in time for her birthing experience.
It will even add to the memory if you made it yourself!
Pampered pooches don't really want to go outside and dig a burrow and you
don't really want them giving birth in your closet or under the bed - right!


